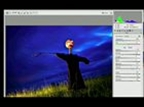
 Many of us shoot in JPEG with a DSLR missing the hidden beauty of RAW. The reason is simple – we don’t know much about it. In RAW you will get much more control over the image, while in JPEG it’s very very limited. Another interesting point is that all changes in RAW are stored in a separate XMP file. So you can always access your original RAW file, unchanged. Here is a brief workflow of RAW processing …
Note – It’s not a step by step process and you don’t need to apply each of them to your images.
- White Balance – temperature and tint adjustment sliders
- Exposure – exposure compensation, highlight/shadow recovery
- Noise Reduction– during RAW development or using external software
- Lens Correction – distortion, vignetting, chromatic aberrations
- Detail – capture sharpening and local contrast enhancement
- Contrast – black point, levels and curves tools
- Framing – straighten and crop
- Refinements – color adjustments and selective enhancments
- Resizing – enlarge for a print or downsize for the web or email
- Output Sharpening – customized for your subject matter and print/screen size
Here is a small video …
Articles
1. Basic Raw Workflow in Photoshop
2. RAW Workflow: A Pro’s Approach
You may also like to read:
Views :4259


Gud 1 ! 🙂